mizzeliz – working for you.. Healthy Foods — Buttons — Gardening

Category Archives: Indoor Gardening

Growing Ginger

I have some so I’m going to try this…ET

By Greenthumb On June 28, 2011

Ginger Roots

Ginger Roots

Have you tried growing ginger yet?

Ginger, known as Zingiber officinale or official ginger is a very easy herb to grow. Even better? You can probably find a start at the grocery store.

This is not the tropical ginger with flashy blooms that you see in Hawaiian photos, but rather the ginger root you use in gingerbread! If you grow your own you can use it fresh or even dry it.

If you can find an organic piece of ginger root with some eye buds forming (sort of like the eyes on a potato) you will have a ginger plant sooner rather than later.


Gigner roots- eye buds

Ginger Roots-See the Green Eye Buds?

Although it is easy to grow in a container or in the garden, Ginger has a few requirements for growing well.

  • It likes warmth.
  • It likes partial shade.
  • It likes moist, rich soil.

If you can provide these things, you can grow your own ginger root!

Here’s the “Ginger Growing 4-1-1″ :

Find a nice ginger root (known as a rhizome) at the store. Look for eye bud swellings.

If you can get them, an organic rhizome is probably better because non organic roots may be treated with a growth inhibitor, and you may want to eat your root at some point! If you can’t find anything else, grab the non organic anyway and give it a try. Organic or not, I have never had one NOT grow!

If you have a large root with several eye growth buds, you can break the root into several pieces, each with an eye bud and plant them all!

Dig your spot in the garden, or use a good potting mix and fill your container nearly full. Plant the ginger just an inch or two beneath the soil, making sure the eye buds are pointing upward!

planting ginger root

Ginger root with growth buds facing up!

Cover the root and water.

A 12″ pot can probably handle two roots, larger containers can handle another one or two. Plastic is best, roots can get ‘stuck’ in terra cotta and you may shatter pots when digging the roots.

Make sure you keep the rhizomes moist, out of bright direct sun and wind.

Compared to other herbs, Ginger plants are ‘slow pokes’ when it comes to growing. They will eventually reach a height of  2 feet or more in a container and may hit a height of 2 to 3 feet in the garden.

growing ginger in a container

Ginger growing nicely!

You can harvest your rhizomes at any time after the plant has grown for several months, but the longer you can keep the plant growing the larger your harvest will be. You may notice the rhizome has some roots. You can just cut them off and use the ginger root, or save a piece (with a growth bud) for re-planting!

You may also notice new ‘buds’ forming at the top of the rhizome. These can be separated and planted for even more ginger!

New Ginger rhizomes

New Ginger Babies!


Since I live where it’s cold in the winter I usually start mine in the greenhouse early in Spring, or in the house in February. Once night temperatures are above 60*F I set them out and let them grow all summer. Roots are harvested when the leaves start to die back in the fall- but before a frost. Frost kills the plant and can harm the roots.

If your ginger has been growing awhile you might find the roots have gotten quite a bit larger by the time you harvest!

If you don’t want to harvest just yet-

You can bring the whole pot inside and store it somewhere dry and cool, but not cold. Remember, it’s a tropical plant! Don’t water it. Don’t even look at. Next year when the weather warms you can add some nice compost, set it out where it’s it will be toasty and watch it begin growing again.

You can also keep it in a warm, well lit area and keep it as a houseplant.

Ginger Plant and Root

Ginger Foliage and Root

Zingiber officinale does not produce a showy blossom like many tropical plants, and the way I usually grow mine does not allow time for the plant to bloom anyway. If you overwinter yours, or you live somewhere warm, humid and tropical you might get a few ‘plain Jane’ blooms from your Ginger plant.

Send me a picture if you do!

How to grow a lemon tree from seed

I have lots of lemons and limes, so I need to get planting… ET

When life gives you lemons, grow trees!

If you’ve ever seen a flowering lemon tree, you’ll understand why. For those of you who haven’t, allow me explain. Their lush, dark green, oval leaves have a glossy texture that shimmers in sunlight. Their delicate white flowers bloom with a citrus fragrance and are soft to the touch. Their exotic nature provides an alluring quality. And, finally, they bear the exciting possibility of fruit!

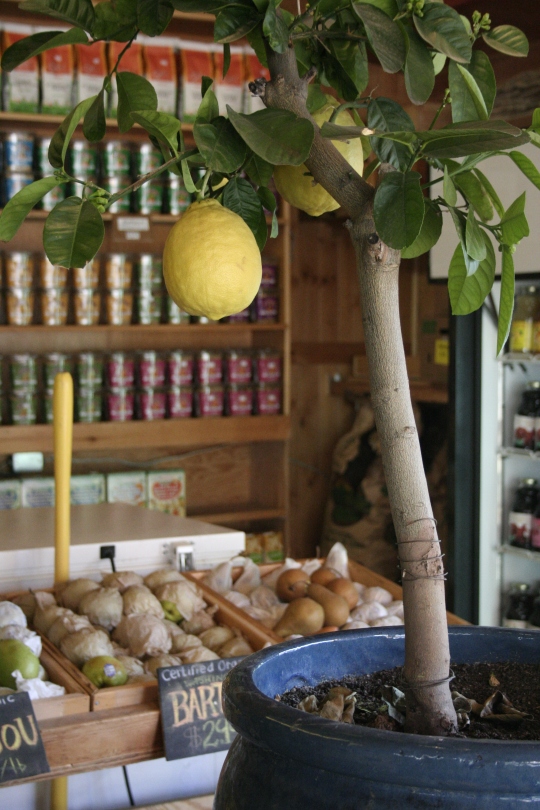
Typically, lemon trees flourish outdoors year-round in hot, sunny regions, but they can also thrive indoors as edible houseplants in cold-season climates. At the organic food store where I work we have a healthy lemon cutting producing massive fruit in a garage setting all year. It makes for an impressive sight during the dead of a Canadian winter!

This is the little tree with big fruit in the shop I work at.

And while rooting cuttings is a sensible option for fast fruit, lemon tree cuttings are not readily available in many parts of the world. But lemons are another story. And although it may take anywhere from 3-6 years for your tree to be capable of producing fruit, there is something extra rewarding about starting from seed. I currently have six strong little seedlings on the go, all of which were germinated in the middle of winter with very little effort. Watching them grow has been an exciting and fascinating experience and I know the best is yet to come.

Here is a step-by-step guide to growing your very own lemon tree from seed:

Things you’ll need:

1. A lemon. Make sure you purchase an organic lemon since some non-organic lemon seeds may be “duds”, incapable of germinating. Any organic lemon will do, but if you have climate or space restrictions, you may want to try looking for a specific variety called a “Meyer” lemon. Meyer lemons are a smaller type of lemon, often grown for ornamental purposes, and are thus better suited for indoor containers. I chose Meyer seeds for these reasons, but you can use any seed that makes sense for your situation.

This is a Meyer lemon!

2. Potting soil. I would guess that any potting soil will do, but I suggest using one with a blend of peat, perlite, vermiculite, and organic fertilizer. Every single one of the seeds I planted in this type of certified organic potting mix have sprouted beautifully, so I think it’s fair to say that it works.

3. Container/pot. A container (with drainage holes) that is 5-6” deep and a few inches in diameter will be sufficient for sprouting; however, the seedling will need to be re-potted into a much larger container. Mature lemon trees prefer a container that is wider rather than deeper, so I suggest planting your seedling in a pot that is 10-16” deep and 12-18” in diameter. Your baby tree will happily make itself at home in this larger container for the next few years, at which time you may want to upgrade again.

4. A grow light or lots of sun. Lemon trees need a lot of light, especially when they are sprouting and require 10-14 hours of it each day. If you don’t have a consistently sunny window (like me), get a grow light. They don’t cost much and will prove their worth in healthy green foliage.

Method for sprouting the lemon seed:

1. Pre-moisten your potting soil. Put some soil into a bucket and mix in some water until the soil is damp all the way through.

2. Fill your container with the pre-moistened soil. Leave about an inch of space below the rim of your container.

3. Slice open your lemon and choose a seed that looks completely full of life. Pop it into your mouth and suck on it until all the flesh is removed and the lemon flavour is gone. Do not allow the seed to dry out at any time. It needs to stay moist in order to germinate. I suggest keeping it in your mouth until you’re ready to plant.

4. Plant your seed! While it’s moist, plant your seed about 1/2″ below the soil level. Cover it completely with soil and water well with a squirt bottle or gentle watering can.

5. Cover your container with breathable plastic to keep your seeds warm and moist. I used a piece of clear garbage bag with holes poked into it and a rubber band to securely hold it in place.

6. Place the container in a warm location and observe for the next few days. Keep in mind: your seed needs warmth and moisture in order to germinate. Don’t allow the potting soil to dry out completely. Also take caution that you don’t cook your seed in its little greenhouse. Too much heat and moisture could lead to a rotten seed! You’re aiming to achieve a nice balance, so if you feel like the soil is warm enough without the plastic then it’s probably safest to remove it.

7. In about two weeks you may notice a sprout emerging from the soil. Once it appears, remove the plastic (if it’s still on) and place the little guy in a warm location with plenty of direct sunlight. Supplement sun with your grow light if needed.

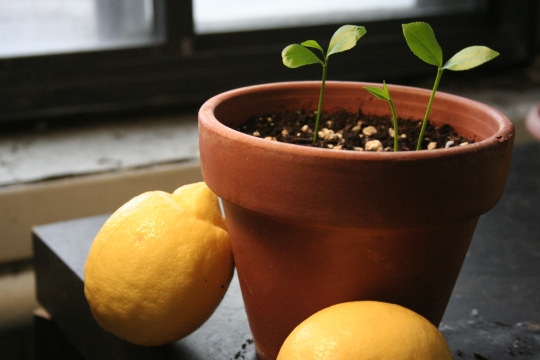
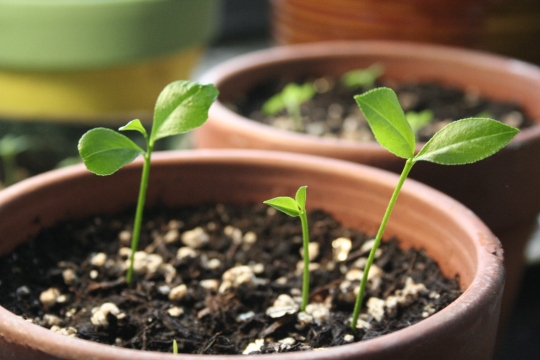
Here are my little guys one month after planting.

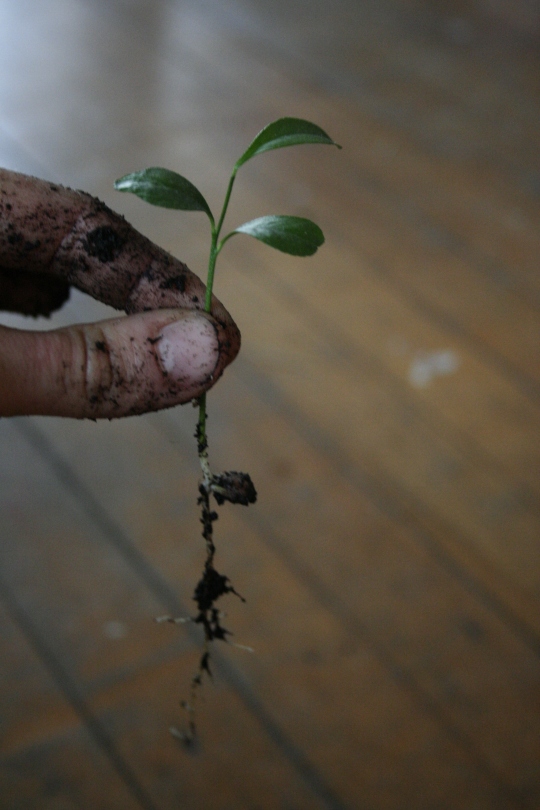
At a little less than two months old, this little guy is upgrading to a larger home.

8. Care for your new baby and watch it grow! Provide it with:

  • Water. Ensure that the soil is damp at all times, especially when your lemon tree is young. Do not allow it to sit in a puddle of stagnant water though; those drainage holes are there for good reason.
  • Sunlight. Place it in a warm sunny window where it will receive eight hours of direct sunlight each day, or supplement some sun for a grow light. Since Toronto rarely seems to get any sun in the winter, my sprouts reside in a well-lit window under the warm rays of a grow light for 12 hours each day.
  • Food. In order to keep your lemon tree healthy and growing the soil will eventually need to be replenished with nutrients. I suggest feeding it an organic fertilizer, such as compost or vermicompost, once it has developed a nice little set of leaves. Dig a little trench around the base of your tree, fill it with compost and water it well. Or, serve it up as compost tea. Try feeding it twice a year or as needed, but do not overfeed! When it comes to fertilizing, less it best; so if in doubt, put it off a bit longer. (Another option is to start your seed in potting soil with vermicompost or worm castings mixed into it).
  • Love. Spend some time looking at your new citrus friend. Pay attention to its growth. Feel it, talk to it, sing to it, but don’t try to dance with it. Get into the habit of watching for browning leaves and checking the underside of leaves for pests. Just like us, our plants can fall victim to bugs and disease and may sometimes require some extra love and affection.

Protea compacta From Wikipedia,


These are some of the most beautiful flowers I have ever seen!!! ET..
Protea compacta
Scientific classification
Kingdom: Plantae
(unranked): Angiosperms
(unranked): Eudicots
Order: Proteales
Family: Proteaceae
Genus: Protea
Species: P. compacta
Binomial name
Protea compacta

Protea compacta is similar to Protea eximia. Its distribution is from the Kleinmond to Bredasdorp Mountains and is one of the best known proteas in the cut flower industry. Its leaves curve upward.


Description[edit]

This is a popular local market cut flower in South Africa, where it is known by the common name of the Bot River protea. Its natural habitat is a narrow region of the south western Cape Province, and it occurs at altitudes less than 100m above sea level, in poor, sandy, generally highly leached acidic soils. The plants tend to grow in close groups where their stems support each other.

The plants can be cultivated in well-drained acid soils, and are tolerant of light frost and salt spray near the coast. Fresh seed germinates readily, and cuttings taken from semi-hardwood in late spring or autumn are usually successful. Visitors to South Africa can see the plant in cultivation by driving the beautiful coastal road from Gordon’s Bay to Hermanus.

Growth Habit[edit]

Erect slender bush, tending to sprawl on richer soils. May extend long stems that reach a max. of 3.5m in height. Relatively short-lived – average age ca. 10 years.

Protea compacta in its natural habitat near Hermanus, South Africa.

Leaves[edit]

Distinctive – ca. 100mm in length, 50mm in width; soft and pilose when young becoming leathery and glabrous with age; margins entire and often reddish; carried closely to the stems causing the stems to appear neat in appearance.

Flowers[edit]

The blooms are a striking pink colour and shaped like the bowl of a wineglass, the outer involucral bracts tending to fade towards the base; up to 120mm long and up 90mm in circumference, carried on long stems of ca. 500mm in length with the bloom at the apex; usual flowering period is early to mid-winter, but may occasionally flower at other times. The colour of the flowers can be quite variable in intensity, and a natural white variety does occur. The bracts are slightly translucent making the flowers particularly radiant when backlit by the sun.

References[edit]

Wikimedia Commons has media related to Protea compacta.
  • van Wyk, B. and van Wyk, P. 1997. Field Guide to trees of South Africa. Struik, Cape Town
  • Pooley, E. 2005. A Field Guide to Wild Flowers of Kwazulu-Natal and the Eastern Region. National Floral Publications Trust, Durban
  • Matthews, L. 1993. Proteas of the World. Bok Books, Durban.
  • Rousseau, F. 1970. The Proteaceae of South Africa. Purnell, Cape Town.

An Herbful Kitchen… Love it!!! From: The Rawfoodfamily

30+ things to do with eggshells — from: http://www.theprairiehomestead.com/

30+ Things to Do with Eggshells

 By  

how to use eggshells

To the majority of people, eggshells are simply trash.

But to homesteader, eggshells are a surprisingly useful resource. You know what they say… “Waste not, want not.”

I personally get a big kick out of finding uses for things people normally throw away. So, I’ve put together a list of 9 Things You Can Do with Eggshells around your own homestead.

(Holy Moly! My list started out with a measly 9 ideas, but after all of my thrifty readers left their ideas in the comment section, it has grown to 30+! I’ve edited the list with these new additions- keep them coming folks!)

**It is very important to only use eggshells from healthy, natural chickens if you or your animals are going to ingest the shells. Eggs from factory farms are not only less nutritious, but can also carry harmful pathogens. I personally have no problem eating raw eggs from my own free-range hens, but I wouldn’t do so with eggs from the store.**

1. Feed them to your chickens.

Boost your flock’s calcium intake by crushing the shells and feeding them back to your hens. My girls much prefer crushed egg shells over the oyster shell supplement from the feed store. I wrote a post a while back that has all the details of collecting, crushing, and feeding the shells.

2. Use the shell’s membrane as an all-natural bandage.

I just discovered this idea, so I have yet to try it, but what a cool concept! The membrane of the shell is reported to help promote healing in cuts and scratches. This post should be able to answer most of your questions about using membranes as a first-aid tool.

uses for eggshells

3. Boil the eggshells in your coffee.

My first thought when I read this idea was ”Why on earth would you do that?” But apparently, people have been boiling eggshells in their coffee for centuries to help clarify the grounds and reduce bitterness. I have yet to give this a try myself, but it might be worth a try. Here is a Boiled Eggshell Coffee tutorial.

4. Sprinkle the eggshells around your garden to deter pests.

Soft-bodied critters like slugs or snails don’t like crawling over sharp pieces of eggshell.

5. Give your tomatoes a calcium boost.

Blossom-end rot is a common tomato problem, but I recently learned that it is actually caused by a calcium deficiency in the plant. Experienced gardeners often place eggshells in the bottom of the hole when transplanting their tomato plants to help combat this problem. I’m definitely trying this next year! For more natural gardening tips, grab a copy of my latest eBook, Natural Homestead. It has dozens of recipes to keep your garden chemical-free.

6. Eat them.

Yeah, I know. First I told you to eat your weeds, and now I’m saying to eat eggshells… Hey, I never claimed to be normal;)

But yes, many folks actually do eat eggshells for their awesome amounts of calcium.  I’ve never actually tried it, but I know that several of my readers have. This post will give you all the info you need to make your own calcium-rich eggshell powder.

7. Use eggshells to start seedlings.

If homemade paper pots aren’t your style, give some of your smaller seedlings a start in rinsed-out shells. This post from Apartment Therapy will give you all the info and photos you need to get you started.

8. Toss them in the compost pile.

Add calcium to your compost by adding eggshells to your pile or tumbler.

9. Sow directly into the soil.

If none of the previous idea sound appealing and you don’t have a compost pile, then you can simply turn crushed eggshells directly into your garden patch. It’s still better than sending them to the garbage.

uses for eggshells

All of the following ideas were submitted by readers of The Prairie Homestead:

10. Potting Soil Addition: Used coffee grounds and egg shells are wonderful in potted plants. I use a 1:4 ratio. (From Tala)

11. Blade Sharpening: Keep them in the freezer and use to clean and sharpen blender blades by adding water. Then pour the mixture into your compost bin. (From Greenie and Ceridwyn)

12. Canine Remedy: I save my eggshells and let them dry out, when I have a good size amount I crush them, then use a coffee grinder and make them into a powder. If one of my dogs get diarrhea, I just sprinkle a couple teaspoons of the eggshell powder on their food for a day and the diarrhea goes away. (From Terri)

13. Calcium Pills: I save my eggshells in a large bowl, then I steam them to sanitize them and let them dry. Then I grind them down (I use a Vitamix but I think any blender would do if you crush them a little first, or just do it in a coffee grinder) into a fine powder and spoon them into 00-size gelatin capsules for homemade calcium pills. (From Mari)

14. Mineral supplement: I sometimes soak eggshells in lemon water for a few weeks in the fridge. Then I add a tiny bit to my shakes to get extra minerals. (From Jill)

15. Tooth Remineralizing: Natural News.com has an article about using comfrey root & fresh egg shell (organic & pasture raised) for re-mineralizing your teeth.  Not sure about this particular method, but it would make sense due to the healing properties of the comfrey AND the minerals in the egg shell.  (From Jennifer)

16. Sidewalk chalk: 5-8 eggshells (finely ground), 1 tsp hot water, 1 tsp flour, food coloring optional…mix and pack into toilet tissue rolls and let dry. (From Linda) 

17. First Aid Treatment: Fresh egg membranes applied, then allowed to dry, will draw minor infections: splinters, pimples, boils, etc. (From Anne)

18. Making Water Kefir: You can also use eggshell to nourish your water kefir grains.  You just add 1/4 of a clean eggshell to your water kefir while it’s brewing.  We’ve done this instead of buying mineral drops and it seems to work great. (From Jenna, Sherry, and Tiffani)

19. Christmas Ornaments: When I found a large cache of slightly-flawed plastic suncatcher ornaments to paint cheap at the local flea market a few years ago, I snatched a big bunch of them up.  I mixed regular acrylic colors with Elmer’s glue and various “texturizing” elements to pack those suncatchers with.  I tried everything from small seeds and spices, to sifted sand, and my favorite turned out to be crushed eggshells.  They were no longer transparent, but the flaws were covered, and they make very nice Christmas tree ornaments, wall hangings, mobiles, etc. (From Sweetp)

20. Make Calcium Citrate: Make your own calcium citrate using only fresh farm raised, preferably organic, egg shells.  Rinse residual egg out of the shells and air dry. Crush the shell and add 1t. lemon juice per egg shell and cover.  The lemon juice will dissolve the shell and there you have it… calcium citrate. (From Mary Anne)

21. Calcium-Rich Vinegar: I was taught by my herbalist teacher to make a calcium rich vinegar by adding calcium rich herbs (nettles, dock, etc) and one clean high quality eggshell to apple cider vinegar.  It needs to infuse for at least six weeks, then be decanted.  But the calcium from the shell and the plants goes into the vinegar and can be used as regular vinegar would be in salad dressing, over cooked greens, etc.  (From Sara)

22. Pan Scrubber: Crushed egg shells work great to scrub pans that have food stuck in them. Yes they will break up, but they still do the job! (From Rose)

23. Ice Cream Addition (?): I was told companies put egg shell powder in cheap ice cream to add extra calcium.  I imagine you could do this when making homemade ice cream as well.(From Brenda)

24. Cosmetic Booster: Make it into a powder and add a little bit to your nail polish to strengthen nails. Take that same powder and put it into ice cube trays with water and rub it on your face– it helps reduce the look of wrinkles. Put the powder in your lotion– it softens your hands. (From Amy)

25. Add to Broth/Stocks: For extra calcium and minerals. (From Becky and Tiffani) (See my homemade stock/broth tutorial here.)

26. Arts and Crafts: Use eggshells to make mosaics or mixed-media art projects. (From Carol and Janet)

27. House Plant Booster: “My Grandmother kept eggshells covered with water in a mason jar which she used to water her African violets. She had the most magnificent plants imaginable!”(From Cynthia)

28. Wild Bird Treat: You can also feed them to the birds. They’re high in calcium and are great for birds in the spring when they are laying eggs– just make sure to sterilize them. Bake them in the oven for 20 minutes at 250 F and crush them. (From Susanne)

29. Laundry Whitener: To help your whites not to turn grey, put a handful of clean, broken eggshells and 2 slices of lemon in a little cheesecloth bag with your clothes in the washer. It will prevent the soap deposit that turns the white clothes grey. (From Emilie)

30. Garbage Disposal Cleaner: Toss a few shells down your disposal to help freshen things up. (From Carol) (Okay– since originally posting this, I’ve had several folks say this is a bad idea and that it will clog your drain– so proceed with caution…)

What do you do with eggshells?

17 Foods To Buy Once And Regrow Forever

17 Foods To Buy Once And Regrow Forever

Want to be notified each time we publish a new blog post? Then make sure you like Natural Living Ideas on Facebook here where we share not only our blog posts, but the best natural living ideas from around the web.


Everyday we  throw heaps of leftovers and scraps out which could actually be used to regrow fruits, vegetables and herbs completely free of charge.

Not only can we save money, but also reduce our carbon footprint. With grocery prices increasing, now is the best time to get frugal in the kitchen and garden.

Below are seventeen fruits, vegetables and herbs you can buy once and regrow forever…

Vegetables

Regrow Green Onions – Want to grow green onions indefinitely? If the answer is yes then follow this tutorial and always have green onions always at hand.

Regrow Onions – This clever method of growing onions in an old used water bottle on a windowsill is a great way to get free onions!

Regrow Carrots -This method to grow carrots from carrot tops is so simple you can get the kids involved. The instant results will get them excited from the word go.

Regrow Celery  – This is a clever idea to regrow celery from the base.

Regrow Sweet Potato’s – The versatility of the sweet potato means it’s a firm favorite with any home cook, here we share a tutorial on how to grow more using nothing but a sweet potato.

Regrow Leeks – Regrowing leeks is similar to regrowing green onions. The simple method is so handy to make the most out of your veggies.

Regrow Bok Choy – Along with celery and onions, bok choy can also be re-grown. This is a fantastic way of cutting your food bills. Why not try it yourself.

Fruit

Regrow Avocado – This easy to follow tutorial requires toothpicks and patience. More avocado’s are not guaranteed, but they have been known to grow. No matter what, you will definitely end up with a great plant  to feature in your garden.

Regrow Lemons – Lemons can be used in so many food and drink recipes alike, even used in crafts and homemade detergents. Why not plant a lemon seed and grow a whole Lemon Tree….

Regrow Pineapples – An impressive tip for pineapple lovers out there! This DIY will leave you with a great pineapple plant making your garden look exotic and unique.

Herbs & Spices

Regrow Ginger – This simple idea requires only a piece of sprouting ginger to regrow more of this fantastic spice forever!

Regrow Basil – Regrowing basil couldn’t be easier, this method will have you growing your own fresh basil in no time. Don’t waste your money on shop bought basil that can ruin quickly.

Regrow Lemongrass – Lemongrass is great in stir-fry recipes and adding a kick to drinks. Here’s how to grow your own.

Regrow A Garlic Bulb – You too can grow a whole garlic bulb from a simple clove. Follow these 5 steps and you will be well on your way to growing your own bulb.

Propagate Rosemary – Regrow rosemary cuttings from your container plant. Why not make even more rosemary plants to fill your garden. This popular herb can be used in a number of recipes so you won’t be short of ideas of what to use it for.

Regrow Lemon Balm – By using the cuttings of Lemon Balm, much like the above Rosemary tutorial, you can re-grow sprouts and plant even more in your garden pots.

Regrow Mint – Mint can be used in so many ways but it’s a pain having to buy a whole bunch from the store. Insteas grow your own and pick what you need!

Following a few of the above tutorials will lower your food bills and provide you with a never ending supply of herbs, fruits and vegetables that you can use in your cooking. Give them a try!

Growing Onions Vertically On The Windowsill

From: http://auntiedogmasgardenspot.wordpress.com/2013/05/15/growing-onions-vertically-on-the-windowsill/

postheadericon One for the enthusiast

May 14th, 2013 | Author: 

How nice would it be to just be able to pluck fresh green onions from the soil whenever you need them? Nothing beats fresh onions for your salads, dips or soup. But how can you ensure a supply of fresh onions at hand all the time?


Sure, onions are available all year round from the supermarket, but they are hardly fresh and there’s almost always no way to know for sure where they came from.

Gardeners of course will simply grow them but some simply have problems with available space.

I came across an image of spring onions grown vertically on the windowsill, using a common 5 Liter PET bottle, which I thought was a practical, space-saving and green way to grow onions. I posted the image on our Facebook Page and a few people asked how it was done…

onions

…and since I was curious myself, I did a bit of research and this is what I found:


FIRST, you need a planting vessel:

plastic bottles

NEXT, you need to remove the neck of the bottle then cut holes around it. You can use a scissor or a heated metal tool to make the holes. Make sure the holes are just the right for the onion bulbs.

CUT BOTTLE

NEXT, fill the bottle with layers of onion sprouts and soil.

LAYER

TOP VIEW

Keep adding layers until you reach the top of the container.


NEXT, water it…

WATER

AND FINALLY, set it on your windowsill…

onions on windowsill - Copy

And watch daily as your onions grow…

125983-c332e-40881528-m750x740-uc8bb7

In no time, you’ll have something like this:

125983-acd6f-40881545-m750x740-u27f90

So the next time you want to add some garnish to your food, sweet spice to your soup, to whip up a savory dish or to make a nice, crunchy salad, all you’ll need to do is pluck some from your vertical onion garden.

And you don’t even have to worry about storing them.